
Run the installation program paypal_install.exe
The files generated are automatically copied to a folder on your hard drive called \paypal\
To run the program, click on PayPal Shopping Cart icon on the desktop.
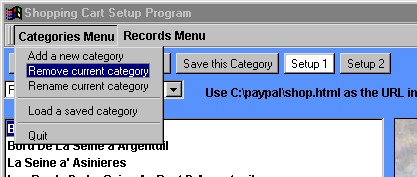
You should see a screen like the one below
You must first remove the current shopping cart and replace it with one of your own.
The current category is called "Example_Category". This is shown in the drop down list box, in the top left hand corner.
To remove this go to the category menu, and select remove current category.
Each category is saved as a file with a .html extension.
You will be asked to enter a name for the new category. If for example you had a video store you might call the category videos . You do not need to add a .html extension, as the program will automatically do this for you.
Enter values for the fields. Your must enter a value for the item and price field or the shopping cart will not work. You can just ignore the other fields and leave them blank if you do not wish to use them. Blank fields are not shown in the shopping cart.
When a category is removed, the category file itself is not actually deleted. You can restore categories that have being removed by selecting "Add a saved category".
Graphics

There are two types of image. Thumbnail and full size.
To create a thumbnail. Create a image that is larger than the height of the thumbnail (default 200 pixels).
Click on the button named Thumbnail and load the image in to the shopping cart.
Click on Scale To Fit and the image will be scaled to size.
The thumbnail will have _small added to the name. The program will also create a new file with that name.
Sometimes it is more efficient to keep the original file for both the enlargement and the thumbnail. In this case no extra thumbnail file will be created.
You can use either gif or jpg files. Include the extension name with the file. sea.jpg from the above example.
3 Drop Down menus
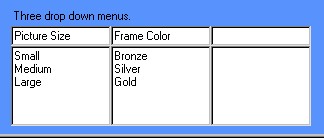
You can give each item different options such as Colour or Size.
Type the name of the option in the top box, and the options themselves below. A new
line for each option.
By adding a currency symbol such as a $ or £ sign to the menu item, you can use the menus to select the price of the goods being bought. For instance
Small $5
Medium $10
Large $15
leave the box where you would normally place the price of the item blank. Unless you wish the two prices to be added together.
Adding and Deleting Records
Click on the NEW RECORD to add a new record, and fill in the details. Click on DELETE RECORD to delete a record.
Viewing the Store
When viewing the store you have two options. Store A or B. Each
one shows a different type of store. They can be selected by clicking on the Store A or B
menu at the top of the screen.